Relay Form Families

One-Line Pavilion

How much of a pavilion can come from decisions the algorithm makes as it runs? The first six studies share a 6 × 6 m site and four ground contacts. The Four-Arch Pavilion grows a shell, subdivides it, and grows a line on its folds. Follow a continuous route through each design and see how forks extend it in the timber study.

Start with agent growth. Four colonies grow toward shared attractors. The canopy takes shape as their branches meet and cross-link.

Agent growth

Four colonies grow from the ground and cross-link overhead. One continuous tube follows the resulting canopy, doubling back beside itself where needed.

Cellular automaton

The active tip adds one voxel at a time. A directional field steers the next birth, producing stepped folds as the line grows.

L-system

A chord breaks into four in a rotated local frame. Repeating that operation makes smaller angular folds inside the larger ones.

Vector field

The line moves through overlapping vortices on tilted axes. The drift between them pulls dense coils into long, open reaches.

Differential growth

The original Serpentine Growth study adds points to stretched spans. Nearby runs push apart and turn the added length into nested folds along one continuous tube.

Branching growth

Straight runs climb from four anchors. Two forks from each support find unused faces on the canopy nodes. The selected spans become 300 × 300 mm timber beams with steel sockets.

Download drawing package (PDF)

Four-Arch Pavilion · Shell and line growth

Change the shell’s rim growth and watch the line find a new route. After subdivision, patches join across the folded surface and their perimeter becomes one continuous line.

From four arches to one line

  1. Grow the shell. The rim lengthens around the fixed feet and crown. Collision checks hold back folds that would pass through each other.
  2. Subdivide the grown mesh. Each triangle splits into four without moving the folded surface.
  3. Grow one line on the shell. The solver scores links between neighboring patches by their length and alignment with a direction field on the folds. It joins the patches into a tree and rounds its perimeter into one continuous line.

In Relay, select 3D Viewer → Open 3D example to orbit the finished line. To try another version, choose Duplicate & edit, set Rim growth (%) in Grow Shell to a value from 0 to 300, then choose Run without AI. Grow Line finds a new route on the resulting shell.

The default reproduces the filmed design. Its drawing set groups the line into 16 proposed assembly zones with matching seams for 411 runs.

Watch the portrait reel

Follow the growth

Four colonies grow toward a shared cloud of points. Nearby branches form cross-links where they can shorten a long detour through the canopy. The line follows every rib and returns beside itself where a branch needs a second pass.

canopy with 19 cross-links. Follow the route from its starting point to the second ground contact.

Run a workflow

  1. Choose Open in Relay on a version, sign in, and choose Duplicate & edit. You can also download its workflow and import it through Menu → Create with your AI → Import workflow.
  2. Choose Run job → Run without AI, then open the result on the 3D Viewer node. Where available, Open 3D example on the shared canvas shows the default model before you run.
  3. For Branching growth, open Drawing package in the run results to download the generated technical sheets. The workbook PDF also includes the Gemini courtyard cover.

From a rule to a design language

Orbit the model and notice where the line gathers, opens up and reaches the ground. In agent growth, nearby branches cross-link into overhead ribs and leave bays underneath. In the cellular study, a tip’s choices accumulate into stepped folds. In the L-system, inherited rotations produce folds at several scales. In the vector field, overlapping directions pull coils onto different axes.

Choose a relationship you would carry into another project. To keep angular folds at several scales, reuse the rewrite and change the rotations. To keep the alternation between coils and open reaches, reuse the vortex field and move its centres. These are ways to specify how a form behaves and let each project produce its own geometry.

Branching growth in timber and steel

Every accepted straight run becomes one square timber beam. At a turn or a fork, the ends meet steel sockets on the faces of a shared box. Reuse that rule in another pavilion by keeping the beam and socket family and moving the anchors or changing where branches are allowed to land.
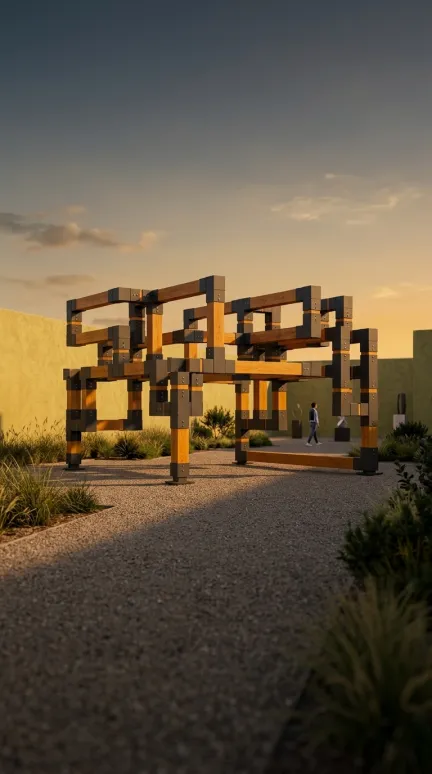
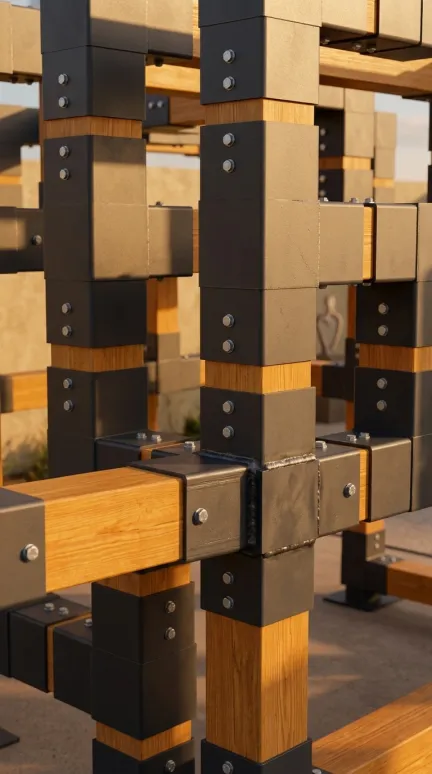
Gemini concept image of the branching timber pavilion in a warm courtyard.
Courtyard concept
Gemini close-up of honey-coloured timber beams and the dark steel fork connection.
Steel fork concept

See the assembly sequence, beam schedule and modeled connector dimensions in the drawing package.

Differential growth in a ceramic workshop courtyard

At 12 rounds the line is about 92 m long. At 25 rounds it is about 148 m long on the same four contacts. The extra length gathers into more nested folds. Carry that relationship into another design by choosing where growth has room to accumulate and where an opening needs to stay clear.
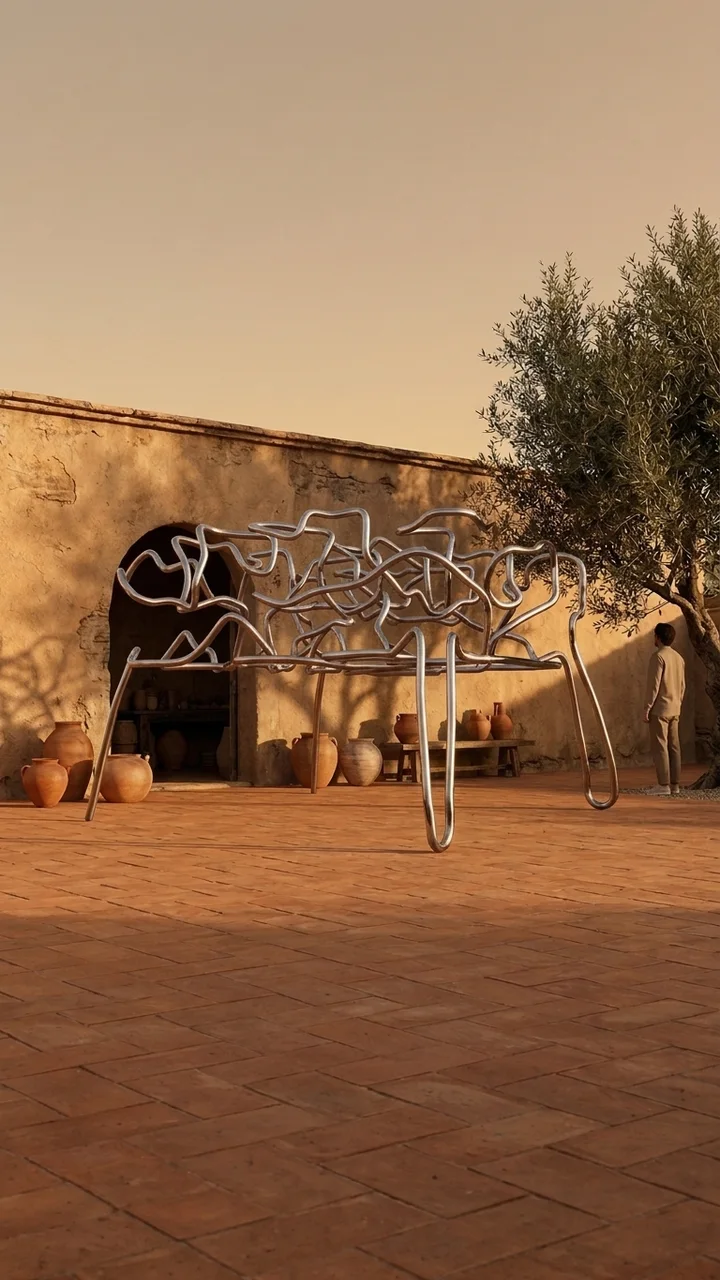
Gemini concept image of the folded chrome-finished tube pavilion in a warm ceramic workshop courtyard.

Cool reflections on the polished chrome help separate the folds from the warm courtyard. Use the Relay model to inspect the exact route and contacts.

Cellular pavilion in 150 mm timber

The same sequence of cell births can read as a modular timber assembly. Use 150 × 150 mm ash for the straight runs and deeper bronze elbows at the sharp turns. The thicker stock makes the steps more visible and reduces the space between nearby runs.
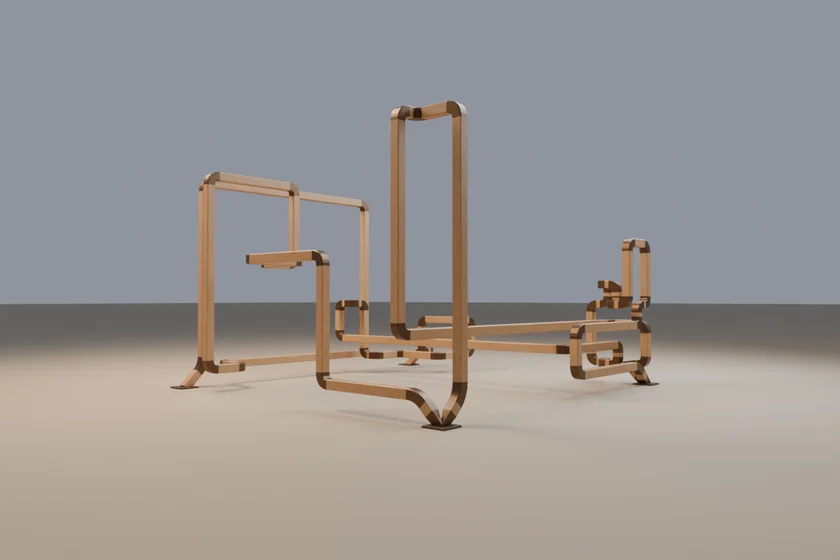
The stepped cellular pavilion in thick ash timber with bronze elbow connectors.
Optional variations

Try seven agent stitches, two L-system generations, cellular seed 37, vector-field curl 5, or 12 growth rounds with differential growth. The animations show these results alongside the defaults.

Optional Gemini visualization

Save a Gemini API key and model settings under Menu → Settings → Your AI connections. The starters use gemini-3.1-flash-image. Choose Run entire job and approve the paid step. Use the image to study material, light and setting. Compare it with the model and check that it preserves the exact route, the four ground contacts and the openings.